
Happy New Year!
I know everyone is busy setting goals and getting excited for the new year. I was planning to do a 2017 goals and planning post, but I changed my mind. I’m easing into the new year. I guess you can say that is my plan – to ease into 2017.
Anyway, I have a quick and easy patch repair DIY. It is actually a reverse applique or patch. With a traditional reverse applique, you are suppose to layer fabric, stitch and then cut away the top layer to reveal the fabric underneath. I did mine a little different. Feel free to look up other methods.
You’re probably wondering why I decided to do a random DIY patch post. Well, my daughter came home from school right before the break with holes in the knees of her black pants. These pants were still fairly new, while I was upset I decided to just repair them.
Here is what you need.
- Pants or jeans that are in need of repair. These pants are made from a ponte knit with a nice amount of stretch.
- Scissors.
- Chalk pen – I use a Clover.
- Fabric to make patches – I used leopard print moleskin from my scrap stash.
- Steam a Seam. Steam a Seam is permanent double sided tape.
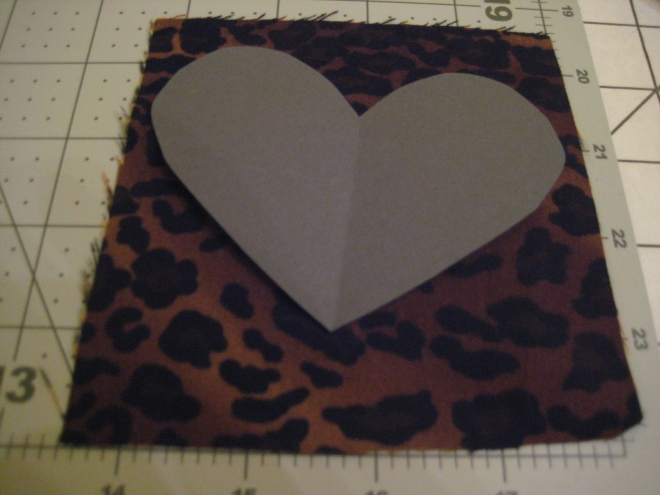
- Stencil of shape – I cut a heart from cardstock.
- Ruler or seam gauge.
- Thread and needle for hand sewing.
- Iron for pressing.
Lets get started!
Here is a what the pants looked like before.


I used my Clover chalk pen to mark off where the holes were at the kneecaps. I used the 12 inch mark on my cutting mat to keep everything even.
I cut a 3 inch x 2 inch heart from some cardstock. Then I cut a square slightly larger than my heart out of my patch fabric.
Place the cardstock heart on top of your marked patch area. Trace heart onto pants with chalk pen.


Cut out heart. Try to cut inside of the heart. Make sure you cut through only one layer or else you will be repairing the back of your pants too.

Turn pants to the wrong side. Cut 4 strips of Steam a Seam onto the right side of your fabric patch. Remember, the right side will be showing and your pants are turned to the wrong side. Press for 20-30 seconds. Tear off paper strips to reveal adhesive.


Place patch over the heart you cut out of your pants. Press for 20-30 seconds.


Turn pants to the right side and lift up the front part of the heart. Place Steam a Seam and repeat the adhesive process. Press.


Now, you can stop here or you can do some hand sewing. Double thread your needle, knot and using a running stitch, hand sew right on the heart you drew on your pants. Use the outline of the heart to keep it even. If your chalk heart is still visible, use that as a guide.


Press. Boom! You’re done.


Here is my lovely model, Miss Kandy. She gave this look two thumbs up! Her only complaint was it wasn’t pink.


Overall, I think this is really cute. I can’t wait to do it with denim. What do you do when you damage clothes that are still new? Upcycle? Trash? Let me know in the comments. Thanks for stopping by.
In case you were wondering, I came in 5th place for Pattern Review One Yard Wonder contest. Not bad for 61 participants. In case you missed it, here is my entry One Yard Wonder.
Peace.


These look great! The fabric you chose is perfect.
LikeLike